Development
Designing Beautiful Focus States
with Ethan Marcotte, Partner at Autogram
Learn how to design beautiful and accessible link focus states in this tutorial.
Resources
Project Files
on CodePen
Transcript
Designing Beautiful Focus States
with Ethan Marcotte
Ethan Marcotte: One of the most popular uses for CSS is applying beautiful hover states to your links. In this video, the links light up whenever I move my mouse cursor over them. Aesthetics aside, hover styles can make our pages more usable. They give a clear signal to users that they can interact with a certain link or element, helping them more quickly take action.
What’s more, hover states are easily created with just a few lines of CSS. However, it’s worth remembering that not all of our users browse with a mouse or trackpad. In fact, many of them use keyboards to navigate through different parts of our designs. As this article from webaim.org reminds us, keyboard accessibility is one of the most important aspects of web accessibility.
Many users with motor disabilities rely on a keyboard. Blind users also typically use a keyboard for navigation. Some people have tremors which don’t allow for fine muscle control. Others have little or no use of their hands.
Since it’s so important to design for keyboard users, let’s explore some ways in which we can make our sites beautiful for them, too. Here’s our sample design. If you want to follow along, you can use this URL on CodePen. And if you’d like to skip ahead to the finished version, that’s available on CodePen, too.
Let’s start with a refresher on how hover styles work. With just a few lines of CSS, I can hover over a link with my mouse to remove the underline and to see the color change. And it’s all done with a rule that targets the link’s :hover pseudo-class.
a {
  color: #a6540b;
}

a:hover {
  color: orangered;
  text-decoration: none;
}
But what happens if I start pressing the Tab key on my keyboard? With my mouse, it was easy to see a visual indication of which link was active. But with my keyboard, it’s quite different.
I’m using the Firefox web browser in this video, and you’ll notice it shows a slight border around each focused item. Note that this is a default focus style and each browser has its own. For example, Safari and Chrome currently use a blue border. As a designer, you might want to design a more consistent focus style.
Back in your project, to replace the default focus style, you can add the :focus pseudo-class to your hover rule.
a {
  color: #a6540b;
}

a:hover,
a:focus {
  color: orangered;
  text-decoration: none;
}
Now when I Tab through the design, I’ve got an effect that’s a little more usable. You can improve on this further by adding a slight dotted outline to links as they’re highlighted with the keyboard.
a:hover,
a:focus {
  color: orangered;
  text-decoration: none;
}

a:focus {
  outline: 2px dotted;
}
This let your links pop just a little bit more for keyboard users, helping them stand out against the rest of the page. Other parts of the page could use some focus improvements, too. If you Tab into the newsletter form, you lose your place again.
Now you’ll add some focus styles to the inputs in this form. Specifically, start by adding a box-shadow to each input on the page. Now when I Tab through the form, there is a clear indication of which field or button has, well, focus.
input:focus {
  box-shadow: 0 0.1em 0.5em rgba(0, 0, 0, 0.5);
}
Now you can build on this effect and change the outline of each text field as your users Tab through them.
input:focus {
  box-shadow: 0 0.1em 0.5em rgba(0, 0, 0, 0.5);
}

input[type="text"]:focus,
input[type="email"]:focus {
  outline: 2px solid rgb(135, 205, 226);
}
Now you’ve got shadows and a brighter outline appearing as you Tab through the subscription form. A little bit clearer, don’t you think?
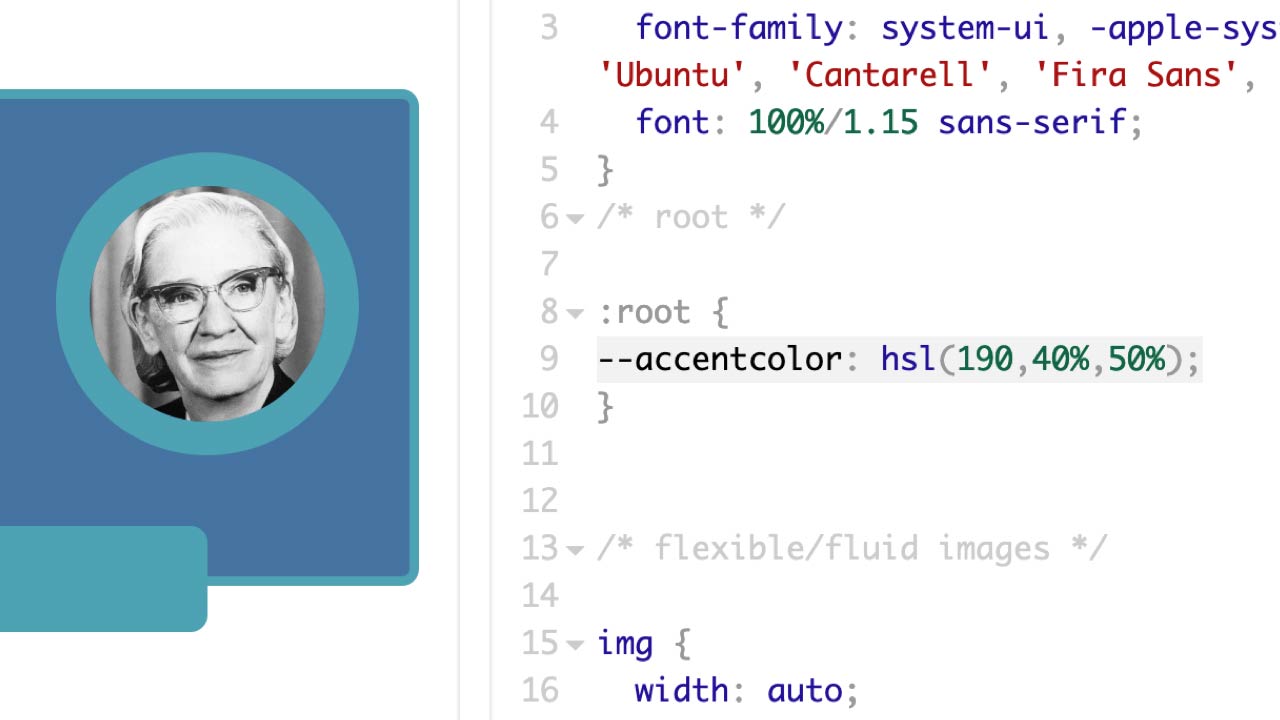
Let’s turn to the gallery, which also could stand to be more focus-friendly. If you look at the core styles that power the link’s design, you’ll see another hover rule. Here the design uses CSS Filters to desaturate each image and then applies CSS Transitions to bring them back to full color on hover while adding a box-shadow at the same time, like you just did on the newsletter form.
.gallery-link {
  display: flex;
  filter: saturate(0.15);
  transition-duration: 0.15s;
  transition-property: box-shadow, filter, transform;
  transition-timing-function: ease-in;
}

.gallery-link:hover {
  box-shadow: 0 0.25em 1em rgba(0, 0, 0, 0.25);
  transform: scale(1.025);
  filter: saturate(1);
}
Additionally, a CSS transform scales the link up very slightly, creating a slight 3D effect. As nice as the effect might be, let’s make sure keyboard users can also access it. Start by adding a focus style to the :hover state that’s already in place.
.gallery-link:hover,
.gallery-link:focus {
  box-shadow: 0 0.25em 1em rgba(0, 0, 0, 0.25);
  transform: scale(1.025);
  filter: saturate(1);
}
As before, you can Tab through the gallery and get the same effect you’d get with your mouse. And just as before, you can add an additional outline for more visibility.
.gallery-link:hover,
.gallery-link:focus {
  box-shadow: 0 0.25em 1em rgba(0, 0, 0, 0.25);
  transform: scale(1.025);
  filter: saturate(1);
}

.gallery-link:focus {
  outline: 3px solid rgb(42, 147, 181);
}
These are just the basics of creating attractive focus styles, making our designs more accessible and beautiful for more people. But we’ve covered a lot of ground, showing that different kinds of links benefit from different kinds of focus styles. It’s an opportunity to let your creativity run wild.
For more tips, check out our Resources section for links to articles and other tutorials that can help you expand on the concepts we’ve covered here. Thanks so much for watching. Don’t forget to check out our other Take 5 videos as well as the entire course catalog here at Gymnasium.