UX
Working with the Timeline in InVision Studio
with Jeremy Osborn, Director of Learning at Aquent Gymnasium
Learn how to create animated micro-interactions using InVision Studio’s timeline feature in this hands-on tutorial.
Resources
Lesson Files
on GitHub
Transcript
Working with the Timeline in InVision Studio
with Jeremy Osborn
In this tutorial, you’ll learn how to use in InVision Studio’s Timeline feature to give you more precise control over your animations. Now you can follow along by downloading the lesson file at this URL or by clicking on the link in the Resources section for this video.
Once you open up the lesson file, you’ll see two artboards that already have an animation created for you. Press the Play button, and you’ll see a practical but fairly boring effect as these thumbnails automatically fade in. So it would be great if we could give this animation a little more character. Go ahead and close that window, and we’re going to give it a shot.
First you need to know how this existing animation works. The only difference between these two screens is the Opacity of these thumbnail images. In the Before screen, click on the Gallery 1 folder. And then Shift + click on the Gallery 8 folder to select all the images.
Notice here in the Inspector that the Opacity is set to 0 (zero). Now, if you looked at these same layers in the After artboard, you would see these images have an Opacity of 100%. Click on the Before artboard. And in the Interaction section, the Trigger is set to Timer. And the Timeout is 1 second (1s), which is how long the screen waits before running the animation.
And just what is that animation? Well, the transition type is set to motion and with a Duration of 0.3 seconds. In InVision Studio, a motion transition compares two screens and then animates any layers that have changed between them, such as those images we just looked at.
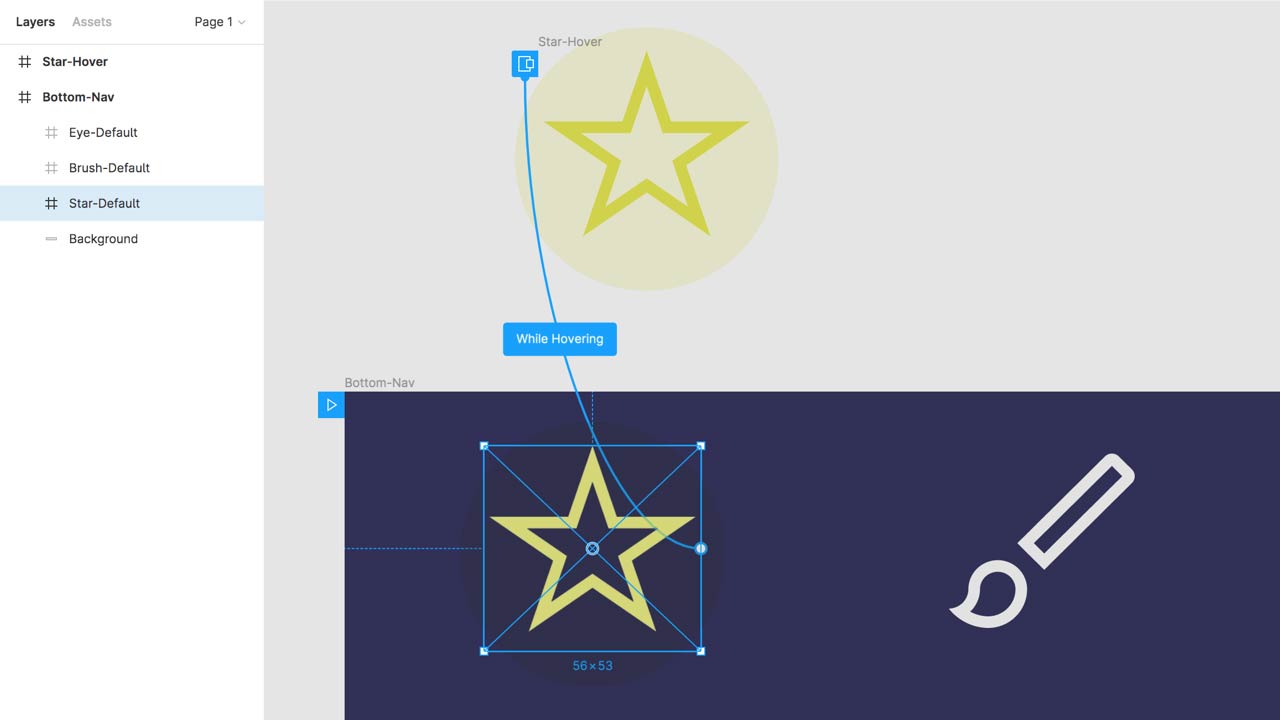
Now go ahead and click on the Edit Timeline button. And you’re going to add a little more sophistication to your effect. First choose the following settings to help you preview this animation in slow motion: Click the Loop Animation button. And then click the Change Speed menu. And then choose 0.2x, and press Play.
Now what this does is loop your animation at a speed that’s 80% slower than the original. Just to be clear, this is not changing the true duration of the fade. It’s just a slow motion preview. And it’s super useful for looking at the timing of the elements on your page and then making adjustments. So go ahead and press Pause.
So the first method of customizing your animation is easing, which is how you can control the acceleration or deceleration of your Opacity effect. InVision Studio’s default setting is called Ease Both. And you can see that by clicking this button here at the top of the screen. Ease Both means all of your animations will have a slow start, a fast middle, and then a slow end. And by the way, if you want to learn more about easing, be sure to check out the Resources section for links to some good articles.
Next you can override easing on an individual layer basis if you’d like. For example, click on the menu for Gallery 1. And then change it to Ease Out. Then do the same thing for Gallery 2.
If you press Play now, you’ll see those two images fade up to 100% much more quickly than the other images. Might seem like a subtle effect. But it does make the page appear to be loading more quickly since those two images are in the top row.
Now, you can also decide when you want individual layers to start animating as well as adjust the Duration of any given animation right here in the Timeline. So Shift + click the Gallery 3 and Gallery 4 layers. And then drag them to the right to have them start at 0.1 seconds.
Then Shift + click the Gallery 5 and Gallery 6 layers, and drag them to start at 0.2. And finally, Shift + click the Gallery 7 and Gallery 8 layers and drag them to start at 0.3. Press Play now, and what you’ll see is that by staggering that start point, you get this nice, cascading effect for your images instead of having them all appear at once.
Now you can also shorten the Duration of any given layer, which you might want to do to give things a snappier feel. To do that, click on Gallery 3 and then Shift + click on Gallery 8. Then grab the end of any layer and drag it to thes left to about 0.2.
Let’s go ahead and test this back on our main page by pressing Done, and then press Play to see the final effect. Pretty cool. If you want to see it again, just click this menu and select the Before artboard to trigger.
Also just for kicks, here’s the original loading screen. And then here’s the revised one — so Original, Revised, Original, Revised. As you can see, the extra attention to detail in the revised version looks a lot more polished and natural.
And guess what? This is just the tip of the iceberg. All you did here was animate Opacity for your images. But you could also animate any number of other properties, including position, scale, color, and much more. And that’s pretty cool, especially for high fidelity, interactive prototypes.
So that’s it. Thanks for watching. And be sure to check out the rest of the Take 5 series as well as our full course catalog at Gymnasium.